A media access control address (MAC address) is a unique identifier assigned to a network interface controller (NIC) for communications at the data link layer of a network segment. Unlike IP addresses, provided by your ISP, router or network admin, the MAC address is assigned by the manufacturer of the network interface controller. However, it is still possible to change that address in case you need to.
What the MAC?
The following is a brief and incomplete summary of the structure of a MAC address. The first three octets are the organizationally unique identifier (OUI) that uniquely identifies a vendor or manufacturer, e.g. Intel. The last three octets are usually the universally administered addresses (UAA), assigned by the vendor or manufacturer in nearly any manner they please, however, they should be unique.
00-07-E9-12-34-56 ---> Intel
How to identify the MAC address of a NIC (network interface controller)
Use the following command in either PowerShell or a cmd window:
PS C:\Users\IEUser> getmac /v /fo list

Connection Name: Ethernet0
Network Adapter: Intel(R) PRO/1000 MT Network Connection
Physical Address: 00-0C-29-62-E3-A1
Transport Name: \Device\Tcpip_{531346A2-CC55-4ABD-94BD-560F5B207B1F}
How to change the MAC address
There are several ways to change the MAC address. When changing your MAC address, usually you don’t want to use completely arbitrary values but use addresses that could technically exist. For example, you could use the known OUI of a vendor for the first three octets and choose the last three octets randomly then. You can download all registered OUI from the IEEE (Download section to the right)[direct link].
The GUI way
Some (not all) network adapter drivers have the built-in feature to change the MAC address in the device settings.
- Open the
Device Manager - Expand the
network adapters - Right-click on your
network cardand selectProperties
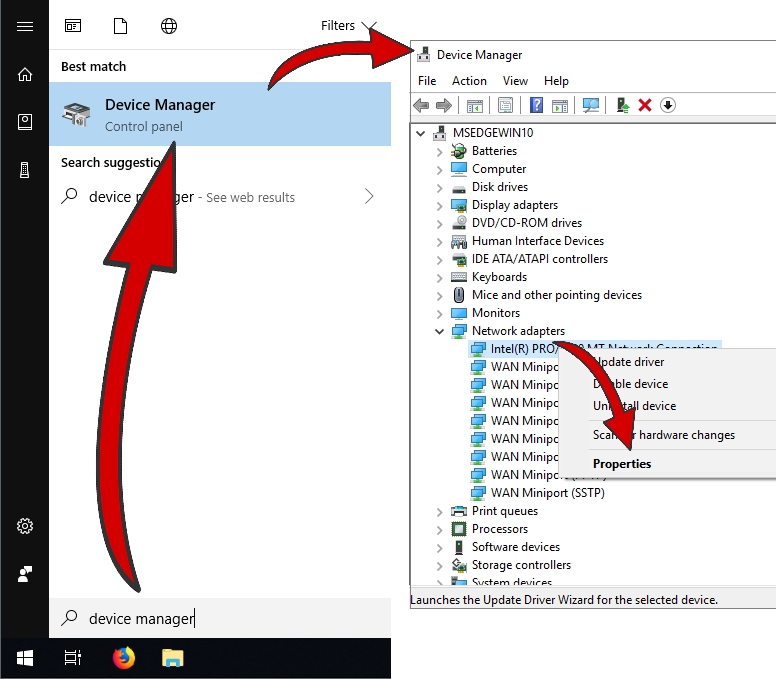
- Click on the
Advancedtab - Select
Locally Administered AddressorNetwork Addressin the list - Enter the new MAC address your network card should have in the
valuefield. You must not type the dashes or colons.
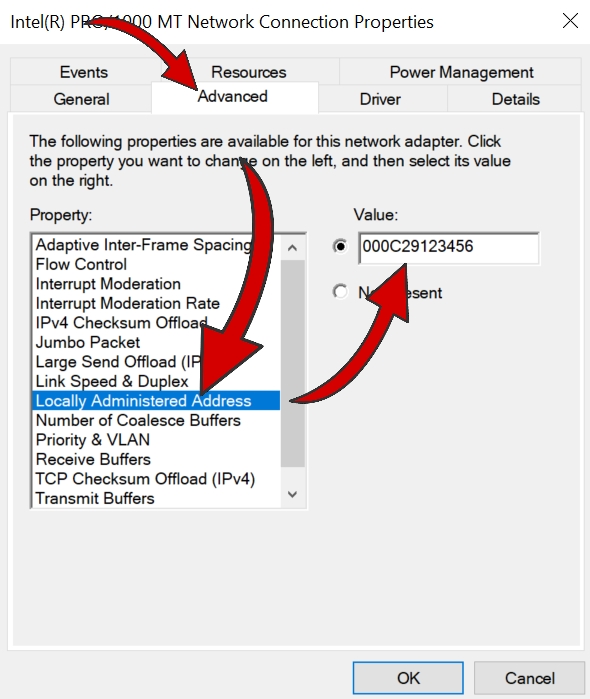
- Press OK, your MAC address has now been changed.
- It might be necessary to restart your network connection.
The registry way
When a network adapter is enabled, Windows checks for the value NetworkAddress in the following registry key:
HKEY_LOCAL_MACHINE\SYSTEM\CurrentControlSet\Control\Class\{4d36e972-e325-11ce-bfc1-08002be10318}\<ID of NIC, e.g. 0001>
If the value is present, it will be used as MAC address, if not, the MAC address provided by the vendor or manufacturer of the network card is used.
- Open the
Registry Editor - Navigate to the key shown above
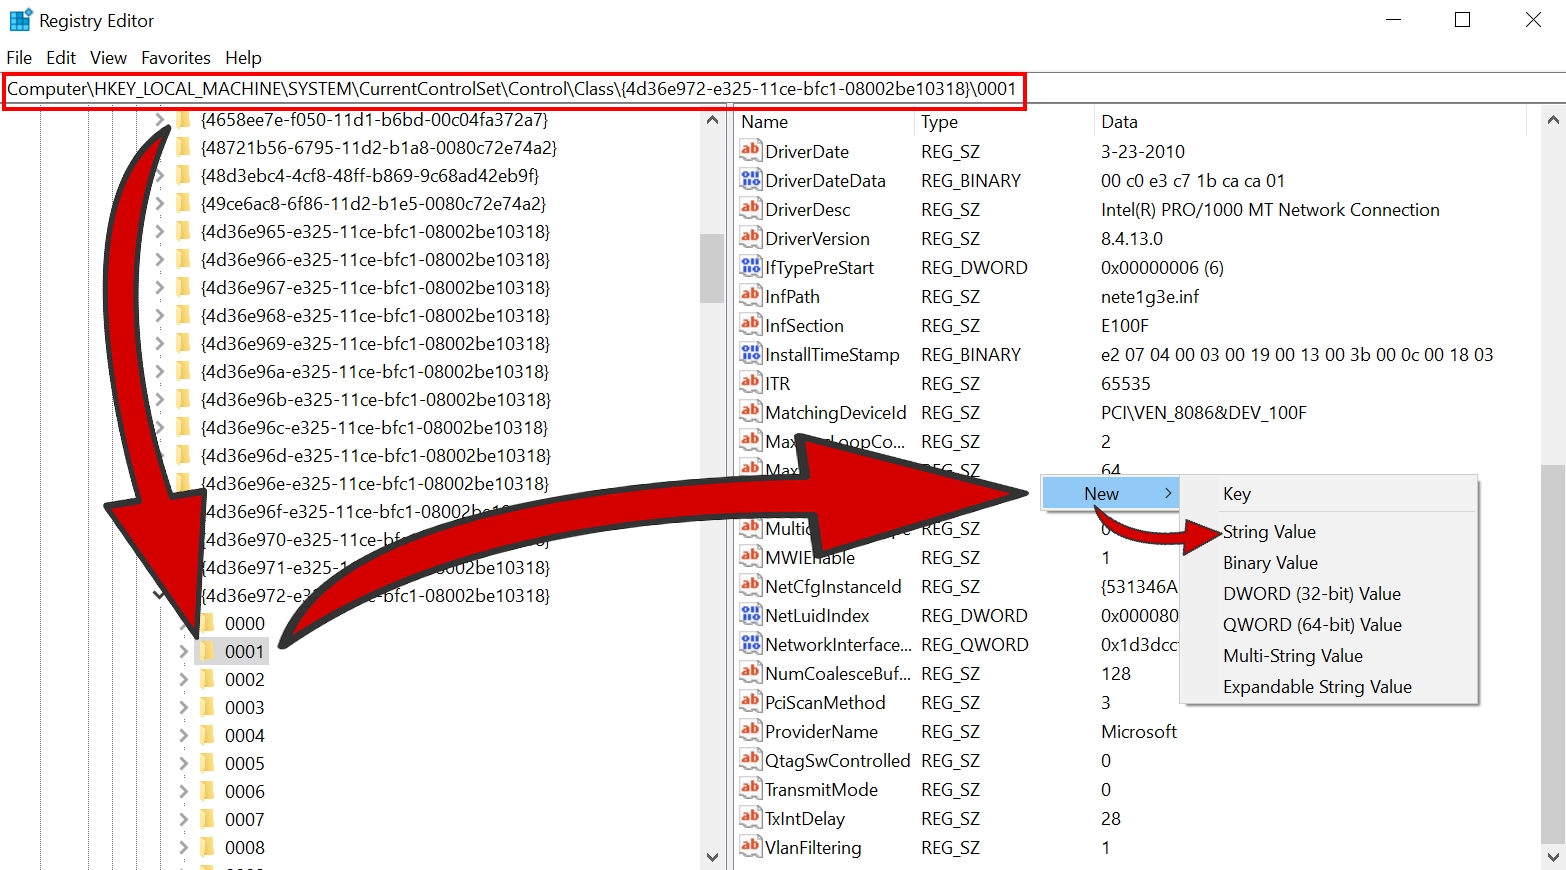
- Right-click and select
New->String Value - Rename that
New Value #1toNetworkAddress - Double-click the renamed value and edit the value data to the new MAC address your network card should have (WiFi networks sometimes only work with a
02as first octet). You must not type dashes or colons.
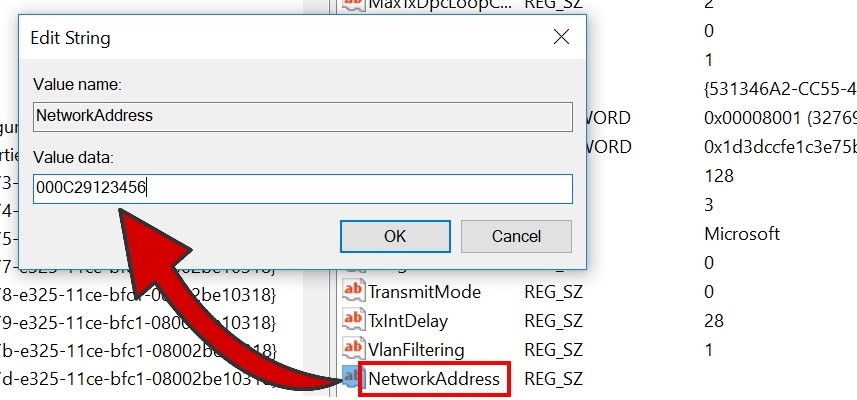
- Press OK, your MAC address has now been changed.
- It might be necessary to restart your network connection.
Third-party way
If you really want to involve a third-party program, there exist different tools to automate or at least make this process more comfortable and less error prone. Use your preferred search engine and look for something like “Windows MAC address changer” or similar. Try to avoid viruses and trojans.
Edit:
After writing this post I decided to create a small Python script to ease up the whole process of changing MAC addresses (GitHub link).